These days, there are numerous search terms which include ‘how-to’ do something. It shows that users always look for the best how-to guidance articles to help them in the best way. To show the posts classified in SERP (Search Engine Result Page), it is necessary to have the suitable structured data. Oxyplug HowTo plugin is the solution for how-to posts which generates the how-to structured data and a nice design for the WordPress posts.
After following the Oxyplug HowTo installation process and activating the plugin on your WordPress website, click on the ‘Add a new post’.
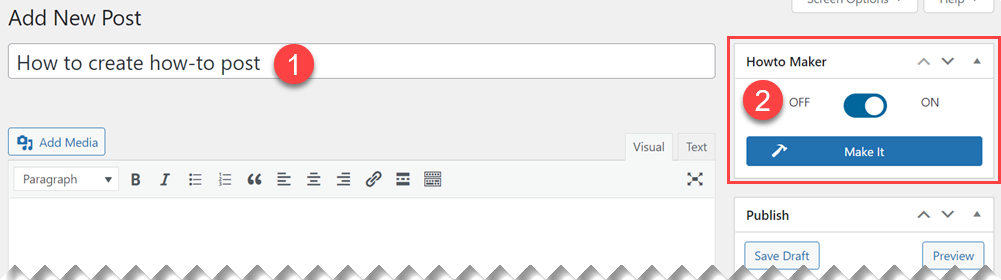
1. Choose a suitable post title.
2. To start creating a how-to post, you need to turn the Howto Maker button on in order to activate the Oxyplug HowTo editor and structured data generator.
NB: By using the Oxyplug HowTo plugin, there is no need to paste your article in the WordPress editor. After following the plugin’s steps, the text will be automatically added to the editor.
HowTo Maker overview
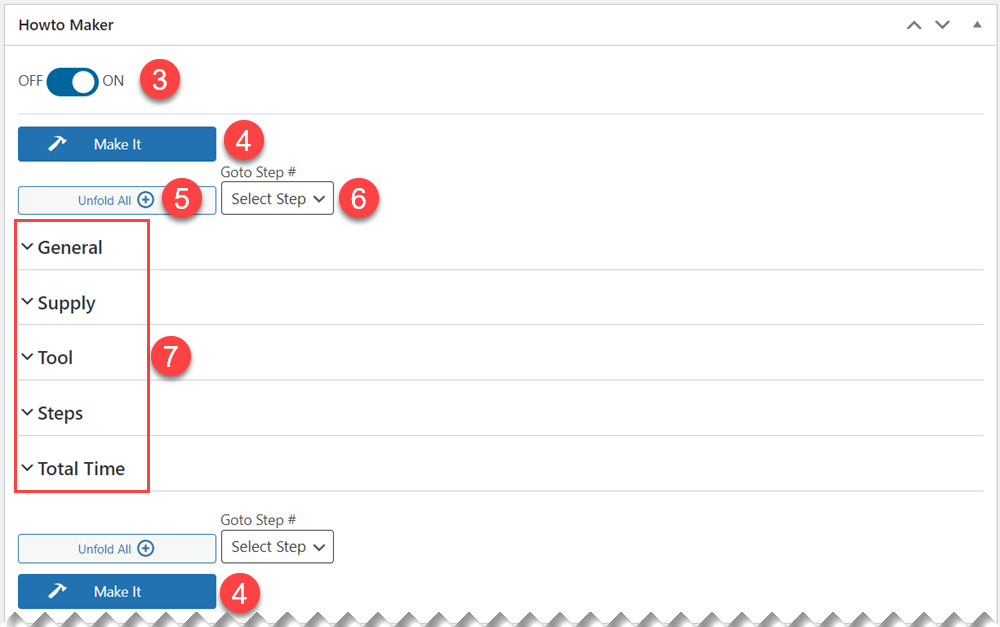
3. You can enable or disable the how-to maker through this button as well.
4. Make It button is used after completing all the steps. It is used for generating how-to structured data and adding the how-to article to the WordPress editor.
5. By pressing the Unfold All button, you can see all the how-to maker steps and if you press Fold All, you can fold all the steps.
6. Go to Step dropdown enables you to jump in the steps which you are looking for by just choosing the step number, so there is no need to look for steps one by one or scroll down to find it.
7. You can see the main steps of the how-to post. They will be explained in detail later.
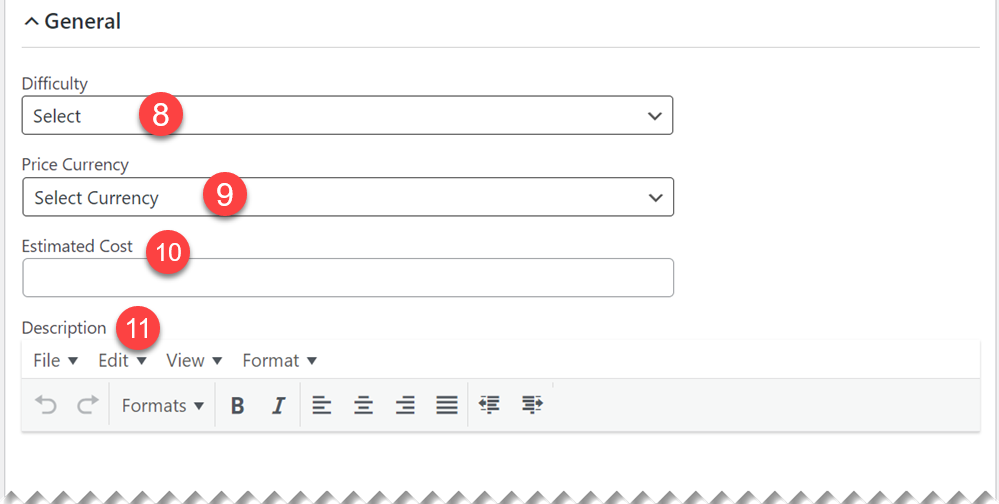
1.1. HowTo Maker General Section
8. In the Difficulty dropdown, there are three levels of difficulty from 1 known as the easy process to 2 as the difficult process.
9. In the Price Currency dropdown, you can choose the right currency.
10. You can consider an Estimated Cost for the how-to step-by-step for the user. Just enter the number without any currency sign.
11. In Description, you can give the users an introduction of what they will read and learn later. It can help users to understand the main purpose of the post and decide whether to continue reading or not.
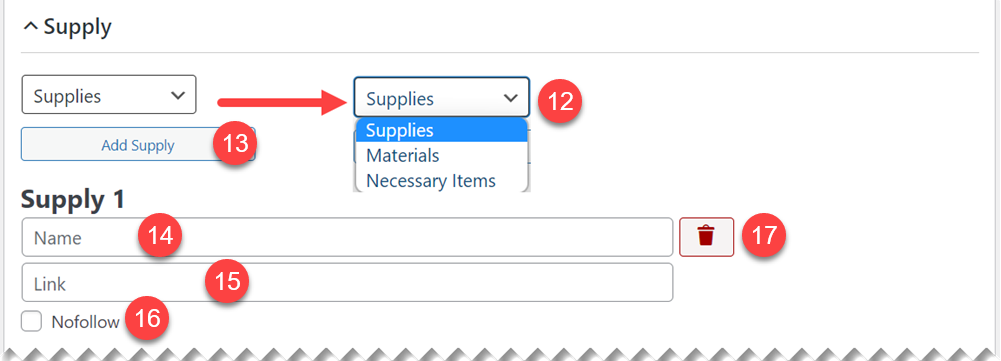
1.2. Choose HowTo Supply
You can add the supplies which are needed to be used in the process. As an example, if you want to learn how to bake a cake, you need the flour as a supply.
12. In the Supply dropdown, there are three options which can be chosen based on the supply type: Supplies, Materials, and Necessary Items.
13. By pressing the Add Supply button, you can add all needed supplies for a process. For adding each supply, the button must be pressed each time.
14. In supply name field, the name of the supply should be entered.
15. You can add a link (internal or external) to the supply which can be a product link on your website or another site. The link will be opened in a new tab, profiting the target=”_blank” attribute.
16. If you have decided to provide an external link for the supply, you can check Nofollow option to add rel=”nofollow” to your link.
17. You can remove each supply by clicking on the Trash icon.
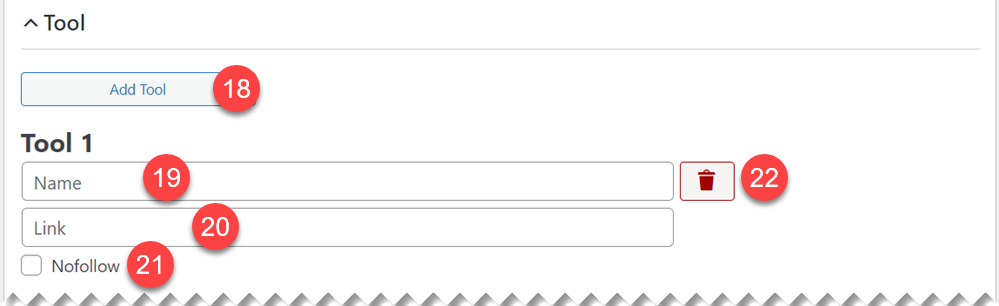
1.3. Choose HowTo Tool
In the tool section, you can add all the tools which are necessary for the process.
18. By pressing the Add Tool, you can add all the necessary tools which are needed during the process. For each tool, the button must be pressed each time.
19. In the Tool Name field, the name of the tool should be entered.
20. You can consider an internal or external link for each tool which can be a product page or whatever is related. The link will be opened in a new tab as it benefits the target=”_blank” attribute.
21. Like supply section, you are able to choose Nofollow option for external links in tools.
22. You can remove each tool by pressing the trash icon button.
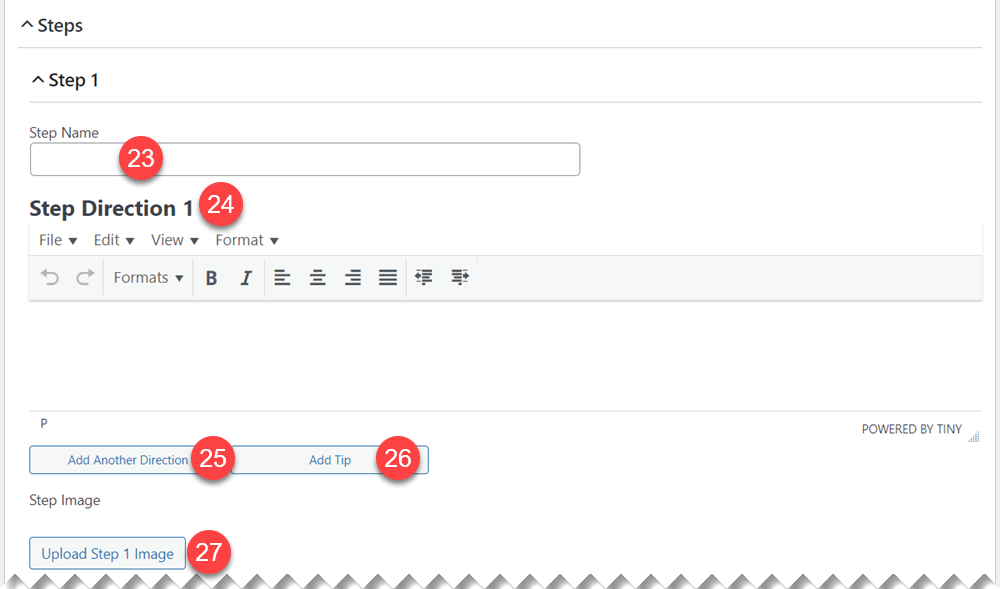
1.4. Adding HowTo Process Steps
In the steps section, you can add each step’s name, description, tip, and image.
23. In the Step Name field, write a suitable name for each step which best describes the step
24. In the Step Direction, write the detailed instruction for that step.
25. You can add more directions by pressing the Add Another Direction button.
26. If there is any special tip for each step, you can add it by clicking on the Add Tip button.
27. An image is needed for each step. You can add it through Upload Step X Image button.
1.5. HowTo Process Total Time
In the total time section, you can precise the time of the whole process.
28. If the process takes long to be done, you can enter the number of days which is necessary to spend for the whole process. Leave it empty if the process does not take a long time to be done.
29. In the hour section, you can enter the number of hours that it takes to be done.
30. In the minute section, you can enter the minutes.
31. After filling all sections correctly, press the Make it button to generate the post and structured data as well.
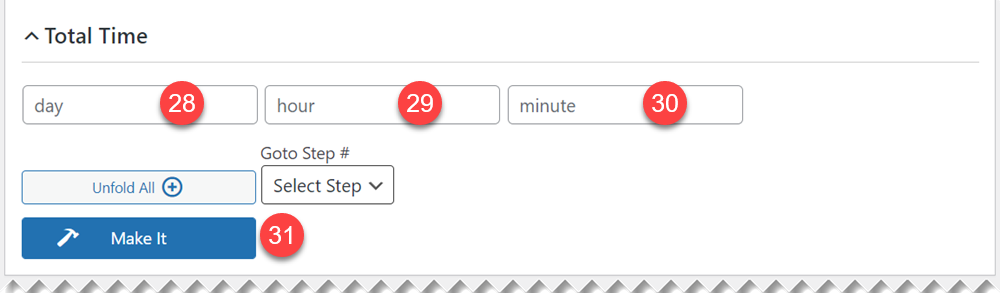
NB: It is necessary to press the Make it button if you made any changes after the first time you have pressed the Make it button.